How to Make and Use "Candle Cup" Fire Starters (Portable Kindling)
By
Alan Silverstein,
ajs@frii.com.
Last update: January 23, 2018
Contents:
What Are They?
-
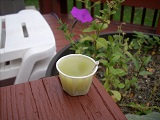
Best all-around fire starter I've ever seen: Small, light,
cheap, portable, reliable, long-lasting, and long-burning. Can start
split pine burning directly with no other kindling! (Click on the
nearby image for full-size.)
-
One-ounce paper cups full of junk wax and a small bit of wick,
fun and relatively easy to make -- but for best results follow the
directions below.
-
Each cup makes a flame about 1" across and 5" tall that burns for
10-15 minutes.
-
Not strictly a fire starter, but rather a form of kindling. You
still need a match, lighter, or igniter, plus a little wind protection
to light the wick until the whole cup gets going. Then the paper cup
forms an exterior wick for a long, strong flame.
How Do I Make Them? (briefly)
-
Obtain one-ounce paper cups, junk wax, and some metal-core (zinc) wick.
-
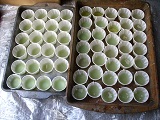
Array empty cups tightly packed on an easy-to-clean surface, such as old
metal trays on top of newspaper (to block mild heat) on top of plastic
(to block hot wax).
-
Melt wax safely (see below).
-
Carefully pour wax into each cup about 1/3 full, and allow to cool.
-
Cut wicks to about 1" lengths, and crimp one wick in half over the edge
of each cup. Orient the same on every cup for easy checking.
-
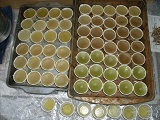
Pour more wax into each cup until full to the brim. Allow to cool and harden.
-
Clean excess wax off the outside of each cup. Store finished candle
cups in plastic jugs or bags, away from intense heat.
How Again Do I Make Them? (valuable details for best results)
What follows is a lot to learn. But if you incorporate all of this
advice based on my own experience, making candle cups is still pretty
fun and easy, plus you'll get the best possible results.
-
Use one-ounce paper cups:
-
Available in bulk from a restaurant supply store, such as 500
"Sweetheart portion cups." For initial experimenting you might just
swipe a few from a fast food outlet.
-
Smaller cups (than one ounce) don't burn long enough.
Bigger cups don't buy you much, just waste space and wax.
-
Plastic cups don't work, you need a paper "wick" around the top.
-
Any old junk wax will do, such as candles from garage sales or
thrift stores, or buy candle wax in bulk from a hobby store.
-
Stiff metal-core (zinc) wick is best for folding and crimping
short lengths over cup edges:
-
Pour 1/4 full first, allow to harden, then pick up one cup at a
time to crimp a wick over its edge. Ensure enough wick is inside the
cup for the wax to grab it when cool.
-
You don't need much wick sticking out. In fact you really don't need
wicks at all, but they make it easier to light the cups, especially if
it's windy.
-
Set cups back down with wicks oriented the same throughout the
array so it's easy to see at a glance that every cup has one wick,
also that it hasn't been bumped off or anything.
-
Pack cups in a tight hexagonal pattern on the metal trays to minimize
drips that make it to the tray.
-
Melt wax carefully to avoid starting a fire!
-
At a thrift store I found an old junk metal teapot with a handle,
strainer, and pour spout:
-
Works great for melting wax in a crockpot. It's even faster with the
ceramic bowl removed, sitting directly on the metal base, but can be
hotter than nominal (see below) on the high setting, so let it cool
some before pouring. Also faster with a cover on the crockpot.
-
Allows me to melt old candles and tidily pour wax while separating
wicks (reusable) and other non-wax components. Dump them out onto
newspaper when the pot's out of wax but still hot.
-
Pour wax as cold as possible (barely melted) to minimize leakage
through the cups:
-
You might add cold wax chunks to the hot liquid just before pouring.
-
Initially pour each cup 1/3 full to weight them down and stabilize
them (a little) before adding wicks, and to minimize leakage later.
-
The second pouring fills each cup to the brim, then the wax shrinks a
little while cooling, leaving a small hollow in the center of the cup.
This is useful for burning the cups. Do not top them off level
with another pouring, they're harder to start burning.
-
Excess shrinkage in the center of a cup means the wax was probably too
hot and some leaked through the paper. If so the best time to remove
the excess from the outside is after the cup hardens but while the wax
is still warm.
-
Candle cups are reasonably water resistant if wax-infused, but I
still try to store and light them dry, even when building a fire in the
rain. (Find dry twigs, and keep them dry, to get them started above the
candle cup before beginning to cook damp wood.)
-
It's easy to keep a small stash of candle cups in a plastic bag in each
hiking pack and/or in your car (along with matches or
lighters). Beware however they do deform a little in cars in summer
heat. Still functional, just not as pretty.
Variations:
-
Some people suggest putting sawdust or dryer lint in the
bottom of each cup before adding wax, but I haven't found this extra
effort necessary.
-
When cleaning up dripped blobs of excess wax from cup exteriors
or the work area, I dump them either back into the melting pot or into
partially-full candle cups before the second pouring.
-
Napalm and similar fire kindlers are OK, but tend to be pricier
and/or messier.
-
Wax-infused sawdust sticks or egg-carton cups (such as
from Boy Scouts) are a bit messier and harder to light.
-
Magnesium blocks are hard to scrape for shavings, although then
they are easier to start with a flint/steel spark.
-
For millennia people have started fires by igniting fine kindling
(somehow) and using it to ramp up through twigs to bigger logs. These
candle cups replace the middle steps. Starting dry split pine
burning directly from a candle cup is possible, I've done it, but you
must stack the wood carefully to catch the intense heat between 2-3 logs
while the cup burns below.
-
In a pinch you can use a candle cup as a source of light! While
camping I've lit them on top of metal foil (or something similar) placed
on a picnic table, to create dinnertime ambience. They don't last as
long as a real candle, but once started they are much more
wind-resistant.
Credit:
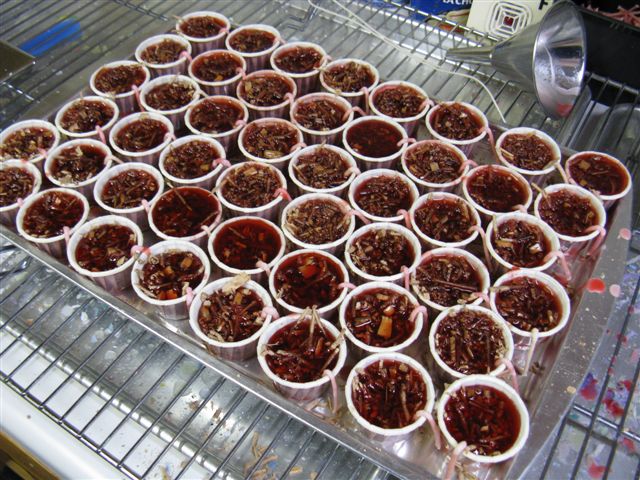
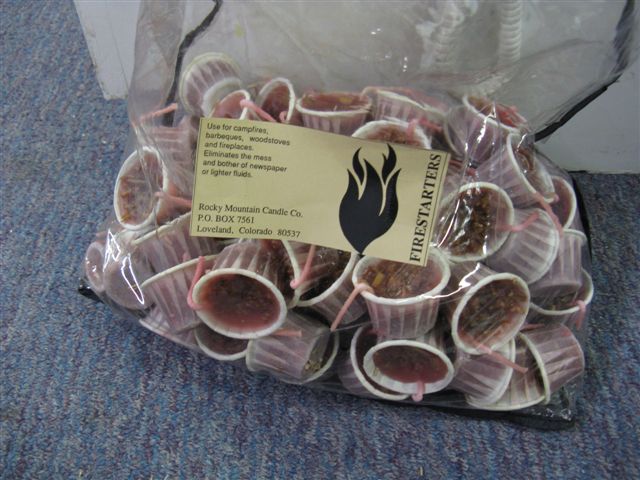
My friend Jean Bendon, a retired professional candle maker, told me
about these devices, but says the name "candle cups" comes from Yankee
Candle. Also to my surprise apparently sometimes she did/does use wood
chips in her candle cups. Here are a couple of pictures she sent me:
History:
My first posting about candle cups, to rec.backcountry, was in July
1993.
My article about them ran in the Colorado Mountain Club magazine,
Trail and Timberline, in Jan 1995.
I made batches of candle cups in at least: Jan 1994, Jan 2005, Oct 2014
(226), and Jan 2018 (62).
